Printer Troubleshooting
Paper Jams and Feed Problems
Clearing jams properly, and stopping them coming back.
Start Here
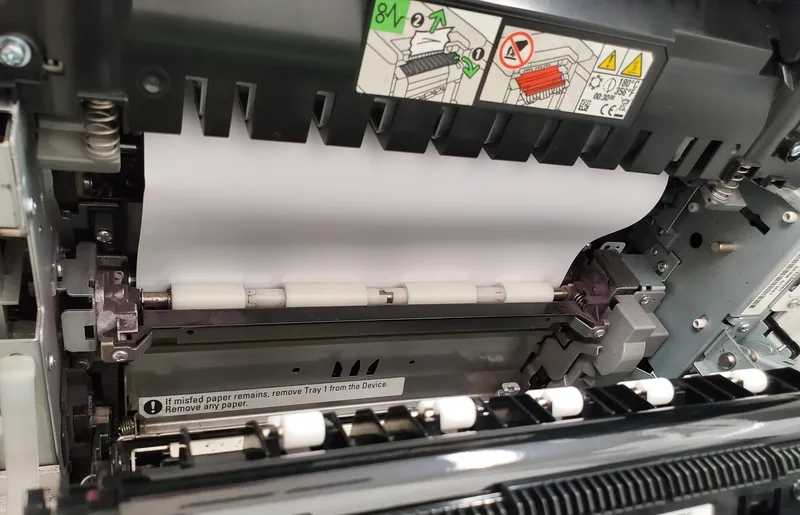
Follow the exact model’s jam-clearance instructions and use only its intended, user-accessible doors and releases. Where the manual directs you to remove a visible sheet, work slowly with even pressure. Never force a sheet or reach into a laser printer’s fuser area; stop if the documented path is not accessible.
First Two Minutes
Before You Reach Inside
- Switch the printer off and unplug it unless the exact-model jam-clearance instructions require a specific powered procedure. On a laser, observe the manufacturer’s stated cooling time and stay out of the fuser area.
- Check each door the exact-model instructions identify as user-accessible. A rear jam door or removable duplex unit may expose another part of the path. Do not unscrew covers or remove a component unless the manual identifies it as user-serviceable.
- Use a flashlight and look for a corner or an edge of paper. Scraps hide behind rollers and in the shadows at the ends of the path, and they are easy to walk past in ordinary room light.
Narrow It Down
Which One Describes Your Printer?
There is visible jammed paper
The aim is to get it out in one piece. Torn paper is what turns a single jam into a recurring one.
- Work out which way the sheet was travelling and pull it that way.
- Use both hands, pull slowly, and keep the pressure even across the sheet rather than tugging a corner.
- If it will not move, stop pulling and check the manual for a user-operated release lever or catch. Use only the control identified for that model.
- Once it is out, check the sheet is complete. If a corner is missing, that corner is still inside.
It reports a jam, but there is no paper to be seen
A false or persistent jam indication has several possible causes, including a torn fragment, debris, a user-accessible sensor flag that has not returned to position, or a sensor or mechanism fault.
- Go back through every door and roller with a flashlight, looking specifically for a fragment rather than a sheet.
- If the manual identifies user-accessible sensor flags, inspect them without forcing or bending them. A flag should move freely and return to its resting position.
- Avoid aerosol compressed air unless the manufacturer specifically permits it; it can spread toner and drive debris farther into sensors or optics. Use the cleaning method in the manual.
- Clean an accessible flag only with the printer unplugged and by the manufacturer’s method. Do not apply liquid inside the printer unless the manual calls for it, and allow cleaned parts to dry fully before reconnecting power.
A jam reported immediately at power-on can indicate a stuck sensor flag, a hidden fragment, or a sensor or mechanism fault. The timing narrows the search but does not identify one part with certainty.
It pulls several sheets at once
Multi-sheet feeding may involve worn or contaminated separation parts, paper condition, or how the stack is loaded. The checks below help separate those causes before a part is blamed or replaced.
- Take the stack out, check it for curled, damp, damaged, or mixed paper, then reload it according to the model’s paper-loading instructions.
- Check the paper guides sit against the stack without squeezing it.
- Inspect only rollers and separation parts the manual identifies as user-accessible. A visibly worn, contaminated, or smooth roller can contribute to feed trouble, but appearance alone does not prove the part has failed.
- Clean accessible feed parts only with the material and method specified for the exact model, then allow any permitted cleaning solution to dry as directed before restoring power.
- If cleaning only helps briefly, the roller or pad may be worn. Replace it yourself only when the manual identifies a tool-free, user-serviceable kit; otherwise arrange service rather than removing covers.
Paper condition can affect feeding. Store it within the temperature and humidity range listed for the printer and paper, and keep unused paper protected from moisture, curling, and dust.
It does not pick up any paper at all
The mechanism is turning but nothing is being gripped, or the printer does not believe there is paper to take.
- Check the tray is pushed fully home. A tray that is slightly out will not trigger its switch.
- Check the paper size set on the printer matches what is loaded.
- If the manual identifies a user-cleanable pickup roller, use its specified cleaning method. If cleaning does not help, the roller or another feed component may require service.
- If the manual identifies a user-accessible paper-present sensor flag in the tray, inspect it without forcing it.
Model Differences
Where to Look on Common Machines
Paper paths and safe access points differ even within one brand. These are examples, not jam-clearance instructions; the exact-model manual and current manufacturer support page take precedence.
HP
Some LaserJet models provide a rear user-accessible path or removable duplex unit. Other models do not, and a rear door may be close to a hot fuser, so use only the access point and cooling procedure documented for the exact printer.
Brother
Some laser models use a rear path and a user-removable drum-and-toner assembly; others use different access. Remove an imaging unit only when the exact-model instructions direct it, and protect its light-sensitive surfaces.
Epson and Canon inkjets
Some inkjet models provide a rear access cover or removable duplexer. Standard inkjet printing does not use a laser fuser, but moving parts, ink, and model-specific powered procedures still require following the manual.
Avoid These
What Not to Do
- Do not pull against the documented paper direction or through the fuser area. Forcing paper can tear it or damage paper-path components. Use only the release points and direction shown for the exact model.
- Do not brush, blow, or vacuum spilled toner unless the manufacturer specifies a safe method and equipment. Avoid dispersing toner dust, keep it away from heat, and use the exact-model spill guidance or arrange qualified service.
- Do not use tools inside the paper path unless the manual explicitly directs it. A tool can damage rollers, sensors, wiring, or imaging surfaces.
- Do not keep clearing the same jam. A jam that recurs in the same place is telling you something is worn or something is still in there.
Being Straight About It
When It Is Not Worth Chasing
Frame, gearing, or paper-path damage needs a model-specific estimate. Parts availability, labor, page volume, replacement cost, and the printer’s remaining condition determine whether repair is sensible; price class or printing technology alone does not settle it.
Related Guides
If pages come through but look wrong, the paper path may not be the problem at all.
If jams are becoming routine, it may be time to weigh a repair against a replacement.
Sources and Further Reading
- HP Support: identify a printer and follow model-specific paper-jam guidance
- Microsoft Support: printer connection and printing troubleshooting, including paper-jam errors
Sources reviewed August 11, 2026. Jam paths, shutdown requirements, cooling times, cleaning methods, and user-serviceable parts vary by exact model. These citations do not imply sponsorship or endorsement.
If You Would Rather Not
If you have worked through this and would rather hand it over, we repair printers on site and by drop-off at our Baker Road office in New Port Richey. We will tell you before starting if we think the machine is not worth the work. Rates are on our pricing page, and travel is charged by driving distance from the office, confirmed from your address before booking. More about the service on our printer repair page.
 Get in Touch
Written by Peter Maz, Raven Technology Solutions. Last updated 2026-08-11.
On-Site Help Near You
Citrus Park | Dunedin | East Lake | Elfers | Holiday | Hudson
Travel is priced by driving distance from our Baker Road office and confirmed from the service address before booking. See every service area.


